Lift-Off Metal Patterning

Lift-off is a technique that allows you to patten a metal layer without any etchant chemicals. Photoresist is spun on, exposed, and developed then the metal is sputtered or evaporated on top of the resist. The photoresist is then striped and any metal on top of it is peeled off. This leaves metal in only the areas in which the resist was not present after developing.

Typically, negative photoresist is preferred for lift-off for a number of reasons but I did not want to change my existing process so I attempted it with positive AZ4210 resist yielding decent results.

Photoresist can be removed in acetone or developer solution (assuming it is exposed by ambient light during processing) but a lower vapor-pressure solvent is preferred. An ultrasonic bath can also improve lift-off.

If lift-off is difficult, a thicker resist film or thinner metal coating can help. Also, substrate heating during deposition leads to resist softening and side wall coating, making lift-off impossible. I used a Peltier cooler in my chamber to prevent this.
Silicon Wafer Laser Scribing and Cutting

Using a 50W Ytterbium fiber laser to scribe and cut Silicon wafers. Laser wavelength is 1062nm and since Silicon has poor transmission at this low IR wavelength, enough energy is absorbed to make laser marks.

Scribe marks are made at higher speed and must follow perpendicular or parallel to a flat of the <100> wafer so that the scribe lies along a crystal lattice line. When cutting all the way through the wafer, higher power is used and arbitrary shapes that do not follow the crystal lines are possible.

Lithography Projector Mod – Color Wheel Removal

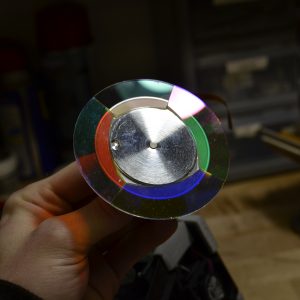
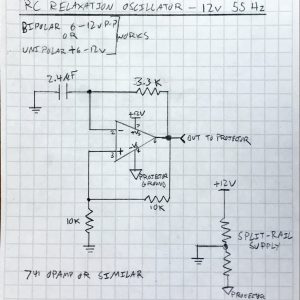
When modifying a projector for photolithography, one thing to note is the UV transmission quality of the optics. Often, the stock color wheel in most DLP projects attenuates that UV significantly on the clear and blue sections. Thus, it is beneficial to remove it however the projector has RPM feedback (from motor back-EMF and/or photodiode) so simply removing it will result in the projector not starting up. A simple RC relaxation circuit can be built to emulate this signal (often 60 or 120hz) so that the projector will function properly.

The circuit shown below is approximate. The 2.4uF capacitor and 3.3KΩ resistor set the frequency of oscillation.

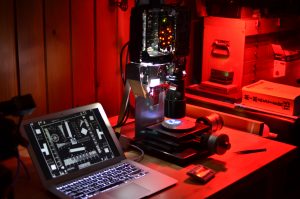
The completed circuit is probed and verified using an oscilloscope, using channels 1 and 2 which display the oscillator output and capacitor charging waveforms, respectively, in the last photo.

In the end, the projector is “fooled” into operating with monochrome light output without a color wheel.

IC Design Tools: From Verilog to Masks

There are a number of open source layout and design tools for ICs however here I will just focus on Magic VLSI. Below are the steps to take a design from Verilog through synthesis and layout to the physical mask that is used for fabrication, via the Qflow digital synthesis flow.

The Verilog digital design for this example is a UART interface from www.asic-world.com and is synthesized/routed with the standard SCMOS rules, however a custom .tech file can be specified containing process details and design rules for DRC.

Once Qflow executes successfully, the design can be viewed in Magic after loading the appropriate cells and a GDS file is generated. This is opened in OwlVision GDSII Viewer or similar which can be used to generate the individual mask image files for each layer (active, poly, metal, etc.)

Using the same tools mentioned above, I also designed a simple PMOS chip to test my process. It is scalable to any reasonable size and contains 2 differential amplifier circuits (seen on right and middle) and a number of diodes/resistors and other test features on the left.

The design requires 4 masks for fabrication: active/diffusion, gate oxide, contact, and metal.

Fiducials should be added for subsequent layer alignment. Note: Grateful Dead bears are necessary for the circuit to function correctly.

Silicon Drift Detector Energy Dispersive Spectroscopy (SDD EDS/EDX) Setup

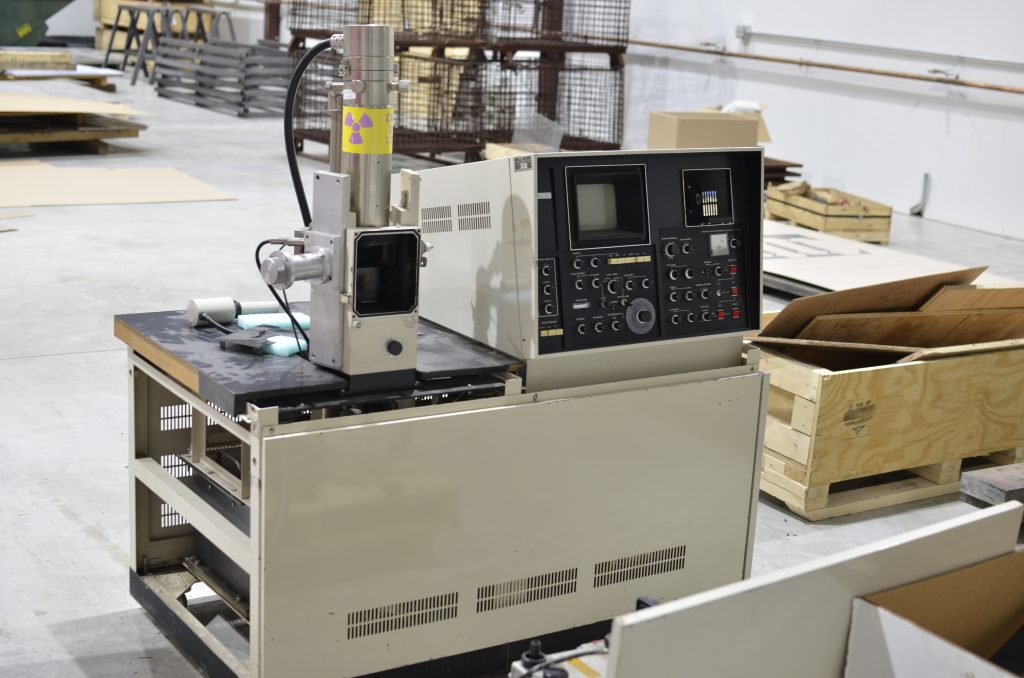
Instillation and setup of a Silicon Drift Detector EDS system. A SDD is a modern detector for Energy-dispersive X-ray spectroscopy that mounts onto an Electron Microscope and allows the user to analyze the composition of a sample. When electrons from the SEM hit the sample, it emits secondary electrons (along with many other particles and energies) which are used by the SEM to produce the image you see on screen and X-rays which are detected by the SDD to produce EDS information. The X-rays have a specific energy which is characteristic of the material and equal to the energy difference between excited and ground state electron orbitals in the atom.

The SDD (30mm2 in my case) quantizes the energies of impinging X-rays and amplifies them to be read by a computer. As compared to traditional Si(Li) detectors, SDDs are faster, have higher resolution, and do not require Liquid Nitrogen cooling.

The detector is mounted to the chamber at a 35° angle which makes it most convenient for use at a WD of 25mm. When using the SEM at lower working distances, the SDD probe is retracted out of the chamber as to avoid collision with the sample stage. The detector is chilled to -30°C with Peltier modules.

The detector has a built in preamplifier. The output is fed to a pulse processor containing an FPGA which connects to a laptop via ethernet.With the SDD, EDS spectra can be acquired in less than a few minutes at high beam currents.

(Click on image to enlarge)

Thanks to Pulsetor LLC, Rick Mott, Jeff Thompson, David Bono, and John Guerard for their extreme generosity and help with the detector.

Inficon Residual Gas Analyzer (Mass Spectrometer) Installation

An Inficon Transpector2 HPR RGA was purchased from eBay and refurbished. I will use it for leak checking and ion selection experiments. Thanks to Aota Vac and Inficon for software assistance!

Put simply, an RGA is a small mass spectrometer that allows the operator to see the composition of the residual gases left in the vacuum chamber after pumping. Basic theory here. 

This RGA is equipped with an electron multiplier so it operates at a maximum pressure of 1e-4Torr and is good down to about 1e-15Torr which is not a limit I will be reaching anytime soon. The spectra shown above indicates a large peak at an AMU of 18 which is H2O. This means that the chamber needs to be baked out to remove water embedded in chamber walls and surfaces until the highest peaks are N2 and O2.

A spectrum analyzer and near field probe was used to determine the main operating frequency of the RGA to approximately 3.02mhz. The RGA is also equipped with an Ar calibration source. Serial logs indicate that it was manufactured in 2007 and has been run thousands of hours past recommended service/filament replacement and the measured total pressure in the chamber was over an order of magnitude too high when compared to a hot-cathode ion gauge, but after calibration everything seems to be in spec.

Dual Source Thermal Evaporation + In Situ Plasma Cleaning

Thermal evaporation deposition of Al and Ge from Tungsten and Tantalum boats, respectively. A blind hole is drilled and tapped in the chamber bottom plate for a center tap feedthrough (common ground) for the boats. Deposition starts at around 7e-7Torr and ends around 5e-6Torr due to outgassing. Aluminum alloys with Tungsten at the high temperature and causes boat failure, a thicker gauge boat will be used in the future or one made of TiB2-BN or BN. Update: W 0.015″ boat thickness seems OK.

Approx. deposition rate throughout the run was 2.2A/s, with total accumulation of 500A. Much faster than my sputtering setup but yields a worse film.

In situ plasma cleaning is via the red ICP coil seen in the 8th picture. A Quartz Crystal Microbalance (QCM) is used to measure the thickness of the deposited films and current is supplied by a rewound microwave oven transformer. The UV-VIS spectrometer is used to monitor the emission spectra of O2 plasma. O2 is flowed into the chamber via a Mass Flow Controller (MFC) until the pressure is 75-100mTorr and the substrate is plasma cleaned for 5 minutes with 100W RF prior to depositions.

As current pass through the boats, they heat up to 1000 – 1800C and subsequently heat up much of the surrounding chamber and mounting parts. This starts serious outgassing in the chamber and without prior cleaning and bake out quickly raises the pressure to non-workable pressures and the deposition rate slows.

I added a second turbo pump to raise the pumping speed/gas throughput (previously 110L/s and now an additional 50L/s) and to tolerate higher outgassing.

It was also noted that the evaporation of Al with lots of H2O vapor in the chamber (no baking) leads to a reduction of chamber pressure (presumably the formation of Al2O3 with H2O) and the production of H2 as seen on an RGA.

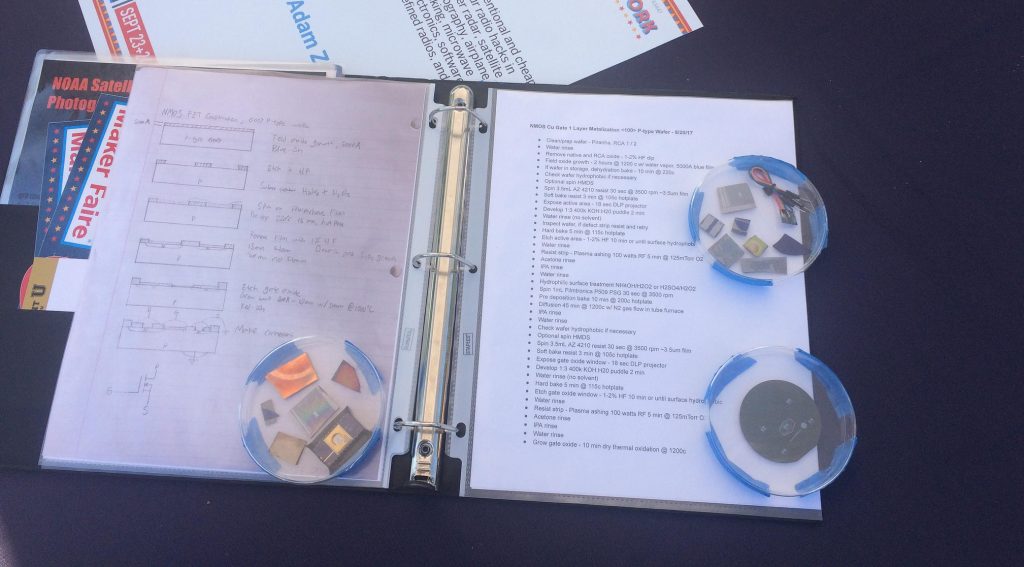
Maker Faire NYC 2017

News features:

36640684863_05b25e1d8c_k

Maker Faire Project Page